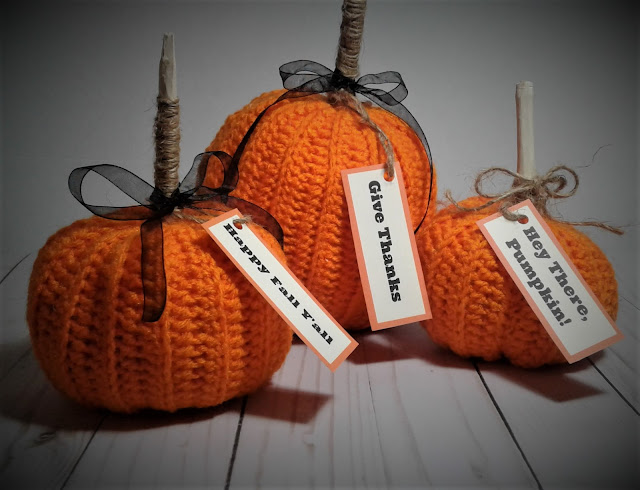
I’m so glad it’s finally FALL!
Colorful leaves, flannel shirts, and colder weather at last. Pumpkins are one of the easiest fall decor that you can crochet. There are lots of patterns for pumpkins out there. But this is my version. It’s rather easy and we will crochet it flat to start with. All you need to know is half double crochet and how to crochet in the back loop only. Similar to making a ribbed hat.
This post contains affiliate links for which I may make a small commission with no extra cost to you should you decide to purchase. This only keeps the blog going and I’m able to give some recommendations. Thanks for your support. Full disclosure and privacy policy here.
Stitches:
hdc = half double crochet; yarn over and insert your hook into the stitch, yarn over and pull up a loop (you have 3 loops on your hook) yarn over and pull through all three loops at once.
hdcblo = half double crochet back loop only; yarn over and insert your hook into the back loop of the stitch, yarn over and pull up a loop (you have 3 loops on your hook) yarn over and pull through all three loops at once.
Materials:
5.00mm crochet hook – if you need to check if you have the right size hook- here is a handy crochet hook chart.
small stick from your back yard or a Wood Dowel
“fiberfill-polyfil”
Optional additions
Ribbon black organza or black plaid
Printout of a fall saying- I made a pdf of some fall sayings. Print on cardstock! You can get them from Etsy
Holepunch to make a hole in the cardstock.
small (medium) ((BIG))
Chain 20 (25) ((30))
Row 1: hdc in the second stitch from your hook and in all across
Working in back loop only from now on
Row 2: hdcblo in all across
Row 3: hdcblo in all across
Repeat row 2 until you have 28 rows! (30) ((35))
Leave a long tail to weave the sides together. Use the tail to connect the 2 sides, put the 2 sides together and join with your tail and a yarn needle.
Use the rest of the tail to weave in and out along the bottom of the pumpkin and pull tight, you may have to weave in and out a few more times until the bottom is tight, Turn the pumpkin inside out and pull the yarn through.
Embellishments!
If you have a stick from your garden that is long enough, you can use a hot glue gun to glue the stick to the bottom of the pumpkin. This plan seemed to work the best for my pumpkins, so that you could actually pick the pumpkin up by the stick.
Fill two sandwich bags with dry beans roughly the same amount and put on either side of the stick at the bottom of the pumpkin. (i used scotch tape to tape up my bags to keep the beans from coming loose. then, fill 2 or 3 more bags with fiberfill. Don’t over fill. Wrap the fiber filled bags around the stick. Now attach more orange yarn to the top of the pumpkin, weave in and out around the top of the pumpkin and pull it tight, continue weaving in and out and around and adjusting your pumpkin as you go.
At this point you might use a drop of glue from your hot glue gun to the stick at the pumpkin edge. Cut off enough twine to wrap around part of your stick, use your glue gun to glue the twine to the stick,-i only glued on one side-(what I determined would be the back of the pumpkin)
Use your hole punch on a preprinted card with a fall saying (Happy Fall Y’all) Cut off a small amount of twine. Pull the twine through the hole and let it hang from the stem (stick). Make a Bow with your ribbon and attach to your stem(you can hot glue that as well)
For more Free Patterns
This post contains affiliate links for which I may make a small commission with no extra cost to you should you decide to purchase. This only keeps the blog going and I’m able to give some recommendations. Thanks for your support. Full disclosure and privacy policy here.


